
Homemade Nanaimo Bar
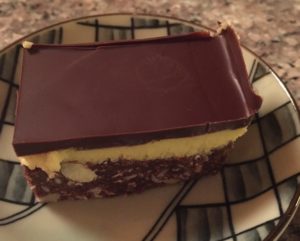
Who does not like Nanaimo Bars? Named after the Vancouver Island city of Nanaimo and they are world famous! They were even served at the Trudeau-Obama state dinner earlier this year. Let me tell you more about them, especially those found on the Nanaimo Bar Trail! First there is the original: a three layer bar of chocolate, nuts, coconut and custard (see above).
Then there are the slight modifications with different flavours, such as mint, cranberry, peanut butter, bacon (yes, bacon) and gluten free ones, too. Add to that the cupcake, cheesecake, cinnamon and truffle varieties and we are talking delicious!
Plus there are also the drinkable delicacies, such as milkshakes, cocktails and martinis. And as if that is not enough how about the non-edible kind: the Nanaimo Bar pedicure, soap, massage oil and cup cozy.
I have a fond memory of my mother making these treats when I was a kid, but only at Christmas time. She would make these well before Christmas, most likely when we were at school, so we wouldn’t stick our dirty little fingers in the many delicious layers as she carefully prepared them. She would then cut them into squares, carefully package them into a container, and place then into the freezer until the right occasion called for them. This was usually when company dropped by, which if I recall happened frequently around Christmas. I wonder if that was because of my Mom’s awesome baking (shortbread, butter tarts, Christmas cake, etc) or my Dad’s scotch or it was just the thing to do during the festive season?
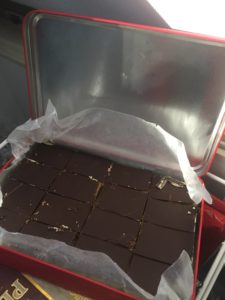
Nanaimo bars – ready to eat and into the freezer
By the time my brother and I we were teenagers and each had bedrooms in the basement level of the house – near the freezer – we were wise to where these delights were stored. Nightly, he would take out one of the bars, carefully rearranging the others in the container so that it didn’t look like any were taken, place it on a shelf in his room allowing it to thaw and then treat himself later in the evening. The sneaky bugger! I, of course, would never do such a thing
Over the years, I have kept up the tradition of making Nanaimo Bars, again, only at Christmas time. Given how somewhat complex they are to make and how deliciously rich they are, I figure that they should only be made on special occasions! Besides, I eat too many of them during my Nanaimo Bar Trail Runs in the summer! Over the years, I’ve adapted the recipe, omitting the somewhat traditional egg in the bottom layer and using almonds rather than walnuts. I’ve even made a vegan and gluten-free version for my daughter. Here’s my version the recipe (with gluten-free and vegan options):
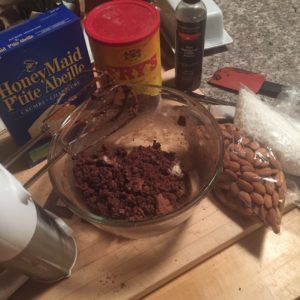
Nanaimo Bars: bottom layer preparation
Top layer:
½ c butter (salted or unsalted, your preference) (or use vegan version)
5 tbsp granulated white sugar
5 tbsp cocoa powder
1 tsp (or lid full) pure vanilla extract
2 c Graham wafer crumbs (or use crushed puffed rice for vegan and gluten free option)
1 c shredded coconut
½ c chopped almonds (or walnuts if you prefer)
Cream together butter, sugar, cocoa and vanilla. Add crumbs, coconut, and almonds and mix well. If this mixture is too dry and crumbly, mix in a couple of tbsps of melted butter. Press into a 9×9 inch pan.
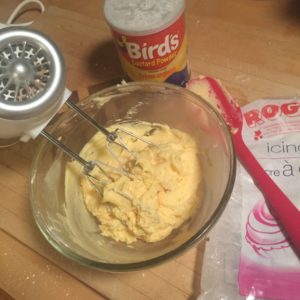
Nanaimo Bars: middle layer preparation
Middle layer:
4 tbsps butter (see above for options)
2 ½ tbsp Birds custard powder (the best)
2 c icing sugar
3 tbsp milk (or vegan version)
Cream together all ingredients until very smooth and thick. Spread on top of the previous layer. Keep at room temperature so that top chocolate layer spreads easier over this layer.
Nanaimo Bars: top layer preparation
Top layer:
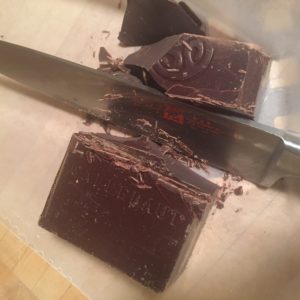
4 oz (or 4 tbsp) of dark chocolate (Callebaut, is my favorite)
1 tbsp butter (see above for options)
Melt these two ingredients together and while still warm, spread over the middle layer, ensuring that it covers all the surface, right into the corners. Shake the pan back and forth over/on the countertop to get a smooth chocolate surface. Chill until firm, but before chocolate is too hard, score the top layer or cut all the way through, into whatever size pleases you! Store in fridge or freezer (but don’t tell your kids where!).
Link to just the recipe for printing.
Legend has it, Nanaimo Bars were created and perfected in Nanaimo, BC at some point in the mid 20th century. The story has lots of versions, but the Nanaimo Museum notes that the first published recipe was in the 1952 Women’s Hospital Auxiliary Cookbook. I personally think it should be MANDATORY that all of this city’s citizens know how to make these treats! You can buy these treats (in a multitude of flavours and formats) all year round in Nanaimo or in many other places in Canada, and even in some more refined bakeries around the world. To balance the richness of these treats, may I suggest you go for a guided run or a walk before you treat yourself to a Nanaimo bar at one of the many places along the Nanaimo Bar Trail or make your own!
I am a runner.

Leave a Reply